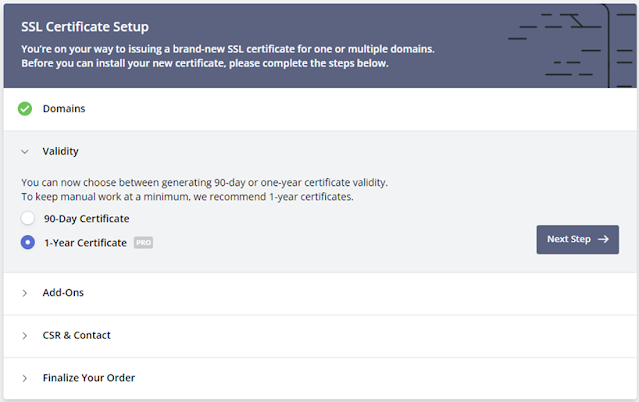
Setting up a free SSL certificate for your domain with
ZeroSSL is a straightforward process. Here are the steps to guide you through
it:
- Create
an Account:
- Go
to the ZeroSSL
website and create an account if you don’t already have one.
- Start
a New Certificate:
- Click on the “New Certificate” button.
- Enter your domain name (e.g., example.com) and click “Next”.
o
Select 90-Day Certificate click Next
Step
o Click
button Next Step
o Click
button Next Step
o Click
button Next Step
- Choose
a verification method: DNS
(CNAME),
o Copy Name and Pointer To past at domain provider
This
environment we using namecheap DNS
4.Go to your DNS Provider (Namecheap.com)
o
Go to Dashboard > Domain List select
your domain click Manage
o
Select Advanced DNS > ADD NEW RECORD
o
Type select: CNAME Record
o
Host: name that provide from certificate
provider
(Ex: _0DB27D200B031301DE258A14027A7C47.pouit.me
o
Value: is Point To provided from cerficate
provider too
(Ex:
C9F56A8FE0091ADFE00EB2EF1F3EA5B5.1EE7209E028DC3035984037244695BE2.4930e6a12b8754e.comodoca.com
5.Go
back to certificate provider
o
Click Next Step
o Click
Verify Domain
- Follow the instructions provided to verify your domain ownership.
- Once
your domain is verified, ZeroSSL will generate the SSL certificate.
- Download
the SSL certificate and the intermediate certificate.
- Depending
on your web server, the installation steps may vary. For example, if
you’re using Apache, you would update your configuration files to include
the new certificate paths.
- Restart
your web server to apply the changes.
- Use
an SSL checker tool to ensure your certificate is installed correctly and
your site is accessible via HTTPS.


